Generate Adapt
Generate Adapt Phone Case
In January 2019 I started working with Northeastern’s product development club Generate on the Adapt team. The goal of our project was to make a phone case with a detachable battery back that wirelessly charges your phone. Ideally the battery pack would attach via magnets and could charge a phone up to 1.5x its battery. I worked with another mechanical engineer to design, model, and print the phone case and battery pack.
Process
After brainstorming different ideas, the other mechanical engineer on the project and I each 3D printed different designs. I worked on this “Indent” idea, where magnets are in the phone case and battery pack, and circular indents are imprinted into the case. The battery pack has circular protrusions that match those of the case when they are together, so the battery pack won’t be affected by shear forces. What I learned from this prototype is that our current magnets are a little too small and too far apart, so the force holding the case to the battery pack is slightly too weak. We printed this case using TPU, which worked will for the phone case, but the battery pack should be printed on something a little less flexible. The width of the battery pack could also be increased without sacrificing the feel of the phone, which would help us fit in a bigger battery.

3D printed phone model, case, and battery pack
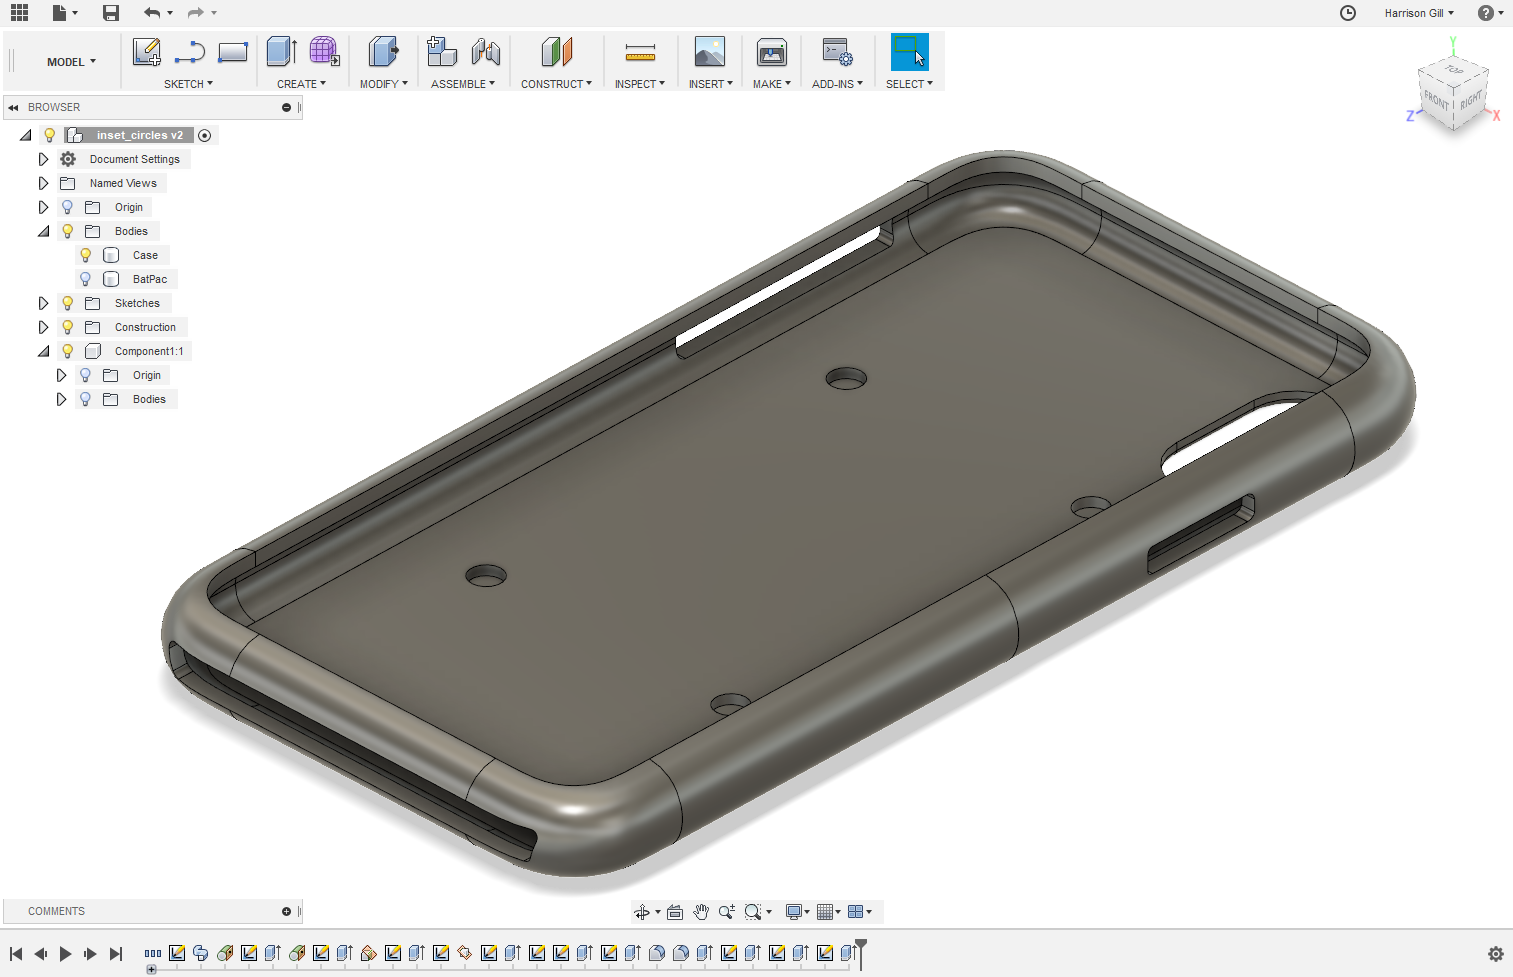
Case model in Fusion 360
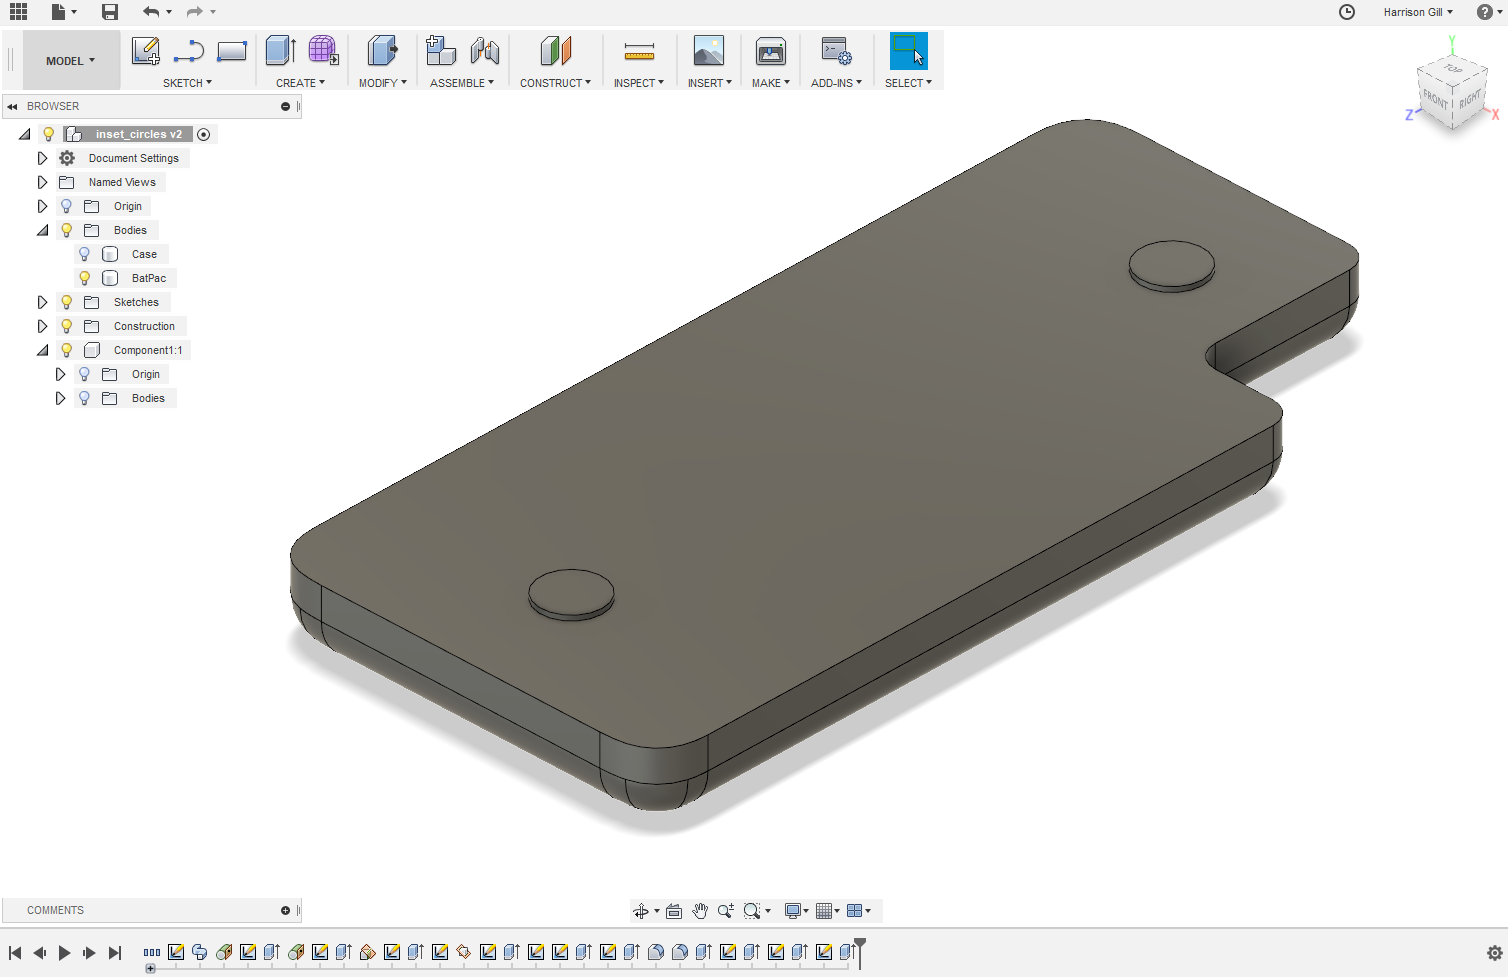
Battery pack model in Fusion 360

Final assembly CAD in Fusion 360
Final version
After user testing, we decided to go with the design from the other engineer, which had the battery back wrap around and “hug” the edges of the case. We then worked with the electrical engineers on the team to figure out exactly how big the separate parts of the case needed to be. Together the other mechanical engineer and I created the various CAD models of the case and battery pack, as well as some small pieces to hold everything within the case. Over the course of a few weeks we designed, printed, and tested multiple versions of the case, until we reached our final prototype. Shown below is the initial proof of concept (left), the two ideas that our team prototyped (middle), and the final prototype (right).

